How to Remove Trim From Aquarium Smoothly Without Issue
Last week, my neighbor shared with me that his aquarium glass was fractured while removing the trim. After listening to him, I found that he did the job in the wrong way. This made me share some methods of how to remove the trim from the aquarium.
The Trim is the black plastic frame that is placed over the aquarium to provide extra support. But many fish lovers consider it as an unnecessary material and so they try to remove it to enhance the optical clarity.
If you are one of them, this article is prepared for you. You can find all the possible ways to remove the trim from your aquarium without making any issues. Scroll down and enjoy them.
Removing Plastic Trim From Aquarium
To remove plastic trim from the aquarium, you can go for any of these methods suggested here.
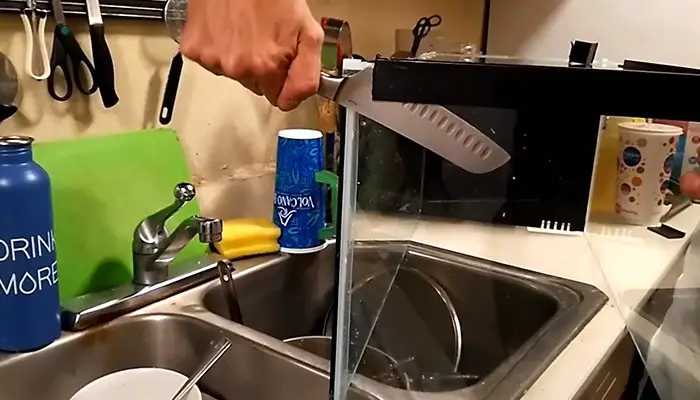
1. Cut the Trim Through Knife
Firstly, you can cut the trim only with a knife. But in that case, you have to provide enough heat to make the knife capable of cutting trim. Go through the following procedures-
Heat the Knife by Torch
First of all, to heat the knife you can use a torch. Make it enough hot by keeping it in front of the torch for 2-3 minutes. You may notice flame for a few seconds. It indicates that your knife is prepared for action.
Cut Some Portions with Knife
After making the knife enough hot, place it on the edge of the trim and cut a moderate amount portion around 6-10 cm. Being too hot, the knife will easily cut the plastic.
Break That Portion After Cutting
The part of the trim that you have cut will be separated if you put a little force to lift it. Break that part properly and uplift.
Pull Out the Rest of the Trim Parts
When you have separated the little cut part, the rest of the portions of the trim will be easy to uplift. Just provide some force and pull it outside. The full trim will be broken.
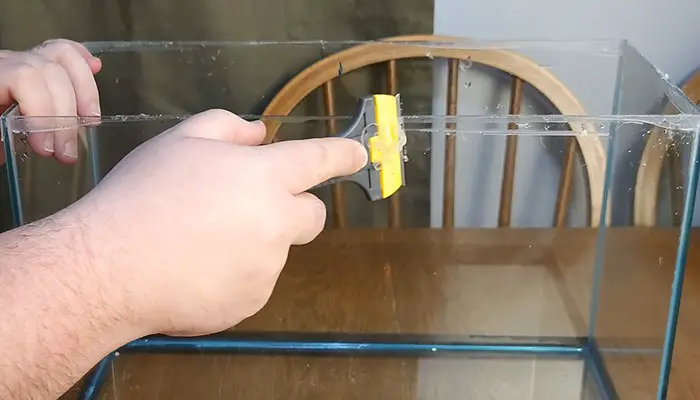
2. Use Paint Scrapper
Following that, using a 4″ paint scraper for this purpose will be beneficial and maybe the easiest for you. To complete this procedure, you have to follow the below-mentioned points.
- Push the scraper on the edges of the aquarium to break the silicone seal.
- Walk the blade repeatedly in the same way as the scraper.
- Complete these two steps both inside and outside the aquarium.
- Take the trim off the aquarium by lifting it with a hand.
3. Splitting Method
Then, I want to inform you about a technical method to remove the trim if you have Dremel and a thin blade in your hand. But to complete this procedure, you have to be skilled and conscious. Otherwise, while using Dremel, the glass part of the aquarium will be fractured along with the trim edge.
If you are interested in this method, you have to-
- Push the blade inside and outside the aquarium edge. If needed, repeat this procedure twice but that is not mandatory.
- Then, use Dremel on the edge of the aquarium over the trim.
- After that, lift the trim from that cut portion.
- Sequentially, you will be able to lift the trim easily from every side.
4. Using Razor Blade
Lastly, I would like to conclude the ways by using only blades. This may be considered the simplest way as you will need just a knife to remove the trim from the aquarium.
- Take a blade that you can expand as you need.
- Press the blade on the edge of the trim to cut the silicon part remaining between the trim and the aquarium glass.
- Remove the trim.
But, you cannot use this method if
- The trim is hard enough
- The aquarium size is too large
Unless these problems, you can enjoy this method and remove the trim from your aquarium.
Cleaning After Removing the Black Trim
After removing the trim, some excess materials remain in the aquarium glass demolishing the beauty of that water tank. It is mainly the glue by which the trim is attached to the aquarium. Follow the steps to remove these unnecessary things after following any of the stated methods.
Remove Excesses by Scrapper
After cutting the trim, use a scraper to remove the sticky materials. Use this on all the sides and remove as much as you can. Clean the extra things with the vacuum cleaner.
Clean Glue Extensions by Acetone
Then, take your acetone or nail polish remover to wipe the glass using a soft cloth. When you will wipe the entire glass, you will find that the aquarium is almost clean in the upper part that was holding the trim.
Wipe With Sandpaper
Though using acetone, some edges or a few parts may be seen as dusty where the glues are still added. You have a final material to clean these tiny particles completely.
Use sandpaper and wipe the full glass parts where the glue remains. This is just like erasing the glass edges.
Which One Is the Best Method?
If you want to justify the best method, I would like to suggest one which is comfortable for you. For example, if you are skilled at Dremel cutting, you should go for that as it will help you to remove trim in a short period.
Again, if you want the easiest method, you may use the scraper method. If the trim is not so large or hard, using a knife will be more comfortable for you.
Whatever, in general perspective, among all of these methods, using Dremel and knife can be considered the best method compared to others.
Is an Aquarium Trim Necessary?
Aquarium trim is mainly placed to provide support to the aquarium. Aquarium glasses face a lot of water pressure created inside it. In this case, if the glass is not thin, the trim provides enough stability so that the aquarium can withstand continuous pressure.
Whatever, this pressure is negotiable to the thick glasses. That’s why this kind of aquarium doesn’t need a trim.
Aquarium Trim Replacement
Well, this phenomenon will capture the attraction of some specific people who like to set up another trim if the existing one is destroyed. So to replace, you have to remove the previous one following any of the above-mentioned procedures.
After that carry on the replacement steps-
- Take a rim that is perfectly adjustable to your aquarium.
- Put glue on the edges of the aquarium.
- Place the trim on the edges and press it downward.
- Place a weight on the rim so that it is placed perfectly and wait for at least 30 minutes for the perfect setup.
- Remove the weight after 30 minutes to 1 hour.
FAQs
Can I Use Dremel To Remove The Trim?
Yes, even it is one of the best ways to remove trim in a short time. But to run it successfully, you should be conscious and experienced.
When Should I Replace The Aquarium Trim?
If the trim is fractured or split, you should replace your trim at that period. Make sure it will not hamper your aquarium.
Final Thoughts
Finally, I am going to wrap up the methods of how to remove the trim from the aquarium. If you want to have an aquarium without trim, you can choose any of the methods.
Before removing the trim, I suggest you check the condition of the aquarium if the glass materials are strong enough or not. In case of perfect things, just apply your favorite one and get a trim-less aquarium.
Complete the method without giving extra stress to your aquarium. Besides, check the materials before working and run those smoothly. Thus, you may get a clean removal of trim from the aquarium.