5 Reasons For Java Fern Turning BLack -Troubleshooting
Java ferns are one of the most popular choices because even a person who struggles with taking care of aquarium plants can easily look after these wonderful ferns. In addition, these unique and vibrant plants put on a great show in the tank along with other fishes and aquatic plants.
And not to mention their low requirement of light and nutrients gives a great advantage as they need less attention from the aquarist. But the sad thing is, sometimes these beauties can fall victim to some factors and turn their leaves black and ugly.
Now, let’s see the 5 major reasons that can turn the leaves of your java fern into black–
- If they are having difficulty to adjust in the new condition
- If the tank light is too high intensity
- If they have been placed on the wrong side of the tank
- If the tank nutrients aren’t enough for them
- If they are invaded by the growth of blue-green algae
Here the good news is, this article will discuss all these reasons and talk about all the easy ways to solve these issues like a pro. Also at the end of the article, there is a complete guide on how to plant the java ferns in the right way.
Meanwhile, let’s check the problems and their quick solutions at a glance–
| Problems | Solutions |
| The Java ferns have not adjusted yet | Lower the lights and cut off the black leaves. |
| The lighting of the tank is too high | Place the java fern in a shaded area and block the lights with other hardscapes. |
| Wrongly plantation | Don’t plant them on the substrate. Instead, plant them near a rock or hardscape with the help of some threads or cables. |
| The nutrient is not enough | Add some liquid fertilizers in little doses every couple of weeks. |
| Too much growth of algae | Reduce the light intensity and change the water of your tank frequently. |
So, now without making any delay let’s get to the detailed explanation –
Why Is My Java Fern Turning Black & How to Fix
1. Adjustment Period
This is the most common reason for the Java ferns to turn black. You see when you are shifting your java fern in a new tank then the plants will take some time to adjust to the new environment of your tank.
Also, another important thing is, that Java ferns grow in nature as partially submerged plants. So, when they are shifted to a complete aquatic condition, the leaves turn brown at first and then gradually turn black.
Control Measure
The only thing you have to do is wait and let the Java fern adapt to the new environment. It will take some time but you can help to accelerate the process by creating an environment they prefer to be in. For this, you can lower the lights for a couple of weeks to help them adjust.
And if there are a lot of mushy black leaves then you can cut them off to make your aquarium look more attractive and tidy. Also, If you do this then the java ferns will grow new leaves and small plantlets from the point of cut ends.
2. Too Much Lighting
Java ferns are native to the tropical rainforests where they grow on the floor so that means they are pretty used to growing in a shaded environment with low light conditions.
If your already established java ferns have turned black very suddenly then the most likely reason is your tank light is not within its preferred range.
Control Measure
First thing, you have to lower the lights and move the java fern to a shadier place where other plants and hardscapes can block most of the artificial lights.
Since your other aquatic plants and fishes will need a moderate amount of light, it’s best to increase the light very slowly so that the Java ferns can gradually get used to it. However, the lights should never be increased to an excessive level because it will burn down the fern leaves.
And the best thing is, after a while when the new leaves grow, replacing the black dead leaves will be better adapted to the tank lighting.
3. Improper Planting
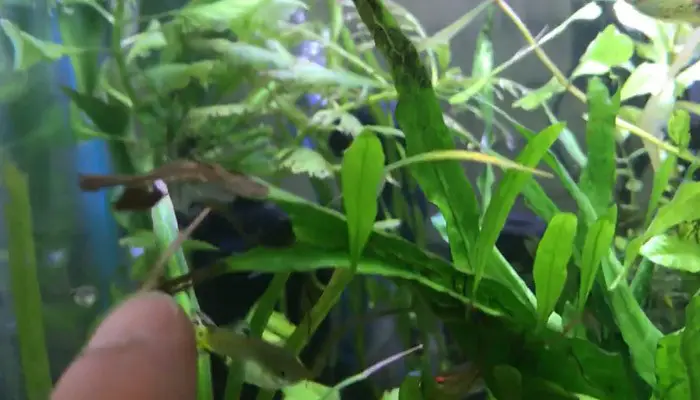
If the leaves of your java ferns have turned black just after planting then it means you have planted them in the wrong manner. This is because they are tropical aquatic plants and so they don’t have a good root system.
Rather they have a root-like organ called rhizomes which they use to anchor themselves with the tank substrates or any other hardscapes like driftwood. And the main thing, in most cases the rhizome doesn’t like to be buried under the substrate.
So, if you have planted them in a tank substrate the java ferns will turn brown and black. Moreover, on a serious note, it can even cause a gradual rotting death of the plant.
Control Measure
Since the Java ferns don’t have true root systems, you have to plant them by giving support to some cables, wires, or rubber bands to help them stay in one place against the water current of the tank.
Slowly the rhizomes will attach themselves to a rock or driftwood and start growing new flush of leaves. And after they have been attached, you can remove the wire supports from the plant.
4. Nutrient Imbalance
When the java ferns don’t get their required nutrients their leaves, especially the tips will turn black and mushy.
Since we know that they don’t grow like normal other aquatic plants, if you use substrate fertilizer they will not be able to use them. This is because they take up nutrients from the water directly through their leaves and rhizomes.
So if you are using general all-purpose fertilizers then the java ferns will face the deficiency of various nutrients and will get easily infected by many fungal or bacterial diseases.
Control Measure
You have to remember that Java ferns always will require liquid tank fertilizers. And it’s best to provide them in little doses whenever you change the water of your tank. Also, you have to give them some liquid fertilizer just after planting so that they can establish themselves quickly
And usually, they don’t need much CO2 but you can still add this in your tank to speed up the growth and development.
One important thing, be careful about the doses whenever you use fertilizers in the tank because a slight overdose will burn the leaves of java ferns and other aquatic plants very easily.
And one more thing, try to cut down on phosphate because high levels of these nutrients can turn the tips of your java fern leaves clear and transparent.
5. High Growth Of Algae
The sudden growth of algae is a serious concern in your tank because these organisms easily spoil the water quality of the tank and also change the water parameters drastically.
And they are very dangerous, especially the cyanobacteria that is known as blue-green algae. These things uptake most of the essential nutrients from the tank leaving nothing left for the java ferns.
Also the java ferns sometimes also melt and turn mushy with brown and black spots due to algae attacks.
Control Measure
To get rid of this algae problem you have to reduce the light in your tank because the algae prefer to grow in high-intensity of light.
Another way you can remove them is by changing the water in your tank very frequently. And with that in mind, you have to try to change at least 20% of the water every couple of days.
However, make sure you keep the nutrient flow going by using small doses of fertilizer every now and then. Also, you can physically remove the algae by scrubbing the tank surface with an algae scraper whenever you notice their growth on the glass.
How To Plant Java Ferns In Your Tank
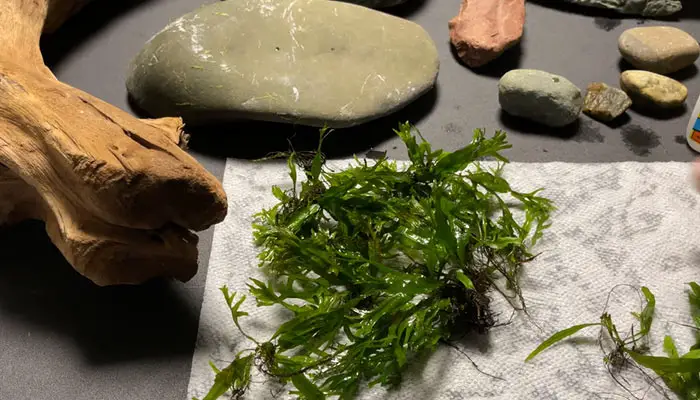
First off, remove all the dead leaves, and then you have to clean the java ferns very carefully. For this, wear disposable hand gloves and then mix one tablespoon of bleach with 300 ml of water. And now dip the whole plant in this solution for two and a half minutes.
After that rinse the plant carefully and immediately for a couple of minutes under the running tap water. And now put them in a small fish tank or a bowl for at least 3 weeks to help them adjust to the submerged condition before introducing them to the actual tank.
Because if you directly plant them in the tank then the java ferns might not cope well with other plants and fishes and start rotting. And this situation will also bring a lot of work for you because it will definitely ruin the ideal tank water parameters.
After it has performed well in the temporary container you can transfer the java ferns to your main tank. While planting, remember to put the plants near a rock or driftwood so that it can attach the rhizomes without any problem.
For better results, you can tie the plant with your preferred rock or driftwood, or any other piece of hardscape until they can naturally anchor themselves. For this, you can use any wires or rubber bands but be sure to tie them gently without hurting their stems.
And one last important thing, be careful not to bury the rhizome under any rock or tank substrates because this will cause the rhizomes to rot.
Again, if you see black spots on their leaves then, before taking any drastic step take some time to see if there is any new growth from those black spots. Because the java ferns usually sprout buds and plantlets from some spots.
However, if the spot does not produce any new growth then you have to decide if the lighting arrangement is too high or if there is any nutritional deficiency. In this case, you have to reduce the light intensity and add some additional liquid fertilizer just to be on the safe side.
And your work is pretty much done here. You just have to wait and let the plant do its magic.
Frequently Asked Questions (FAQs)
Java ferns are very resistant to most diseases so if their leaves are turning brown and black luckily you just have to adjust the aquarium parameters like light, and nutrient requirements according to the java fern’s needs. Also, keep out the invasions of blue-green algae, and gradually the ferns will recover completely. Java ferns don’t need to be submerged completely. However, their roots, especially the rhizomes, need to be under the water all the time. Otherwise, you can have the leaves of the java fern out of the water without any problem. The signs of your java fern dying are– brown and yellow leaves with a lot of pin-like holes. Also, there will be a lot of small plantlets growing from the point of dead leaves. Moreover, the whole plant will stop growing any new leaves at all. In the last stage, the java fern will start turning black because of the rotting.
Can Java Fern Recover?
Can Java Grow Out Of Water?
What Does A Dying Java Fern Look Like?
Conclusion
Java fern can live with low light and nutrients and does not require much attention as long as it’s healthy. However, when their leaves are turning black, it’s time for you to start taking some measures before they end up spoiling the whole tank full of water.
I have tried to include all the necessary information about the java ferns turning black and I hope this article has gracefully helped you to navigate all the important factors that you need to take care of so that your java ferns are completely revived like newly established plant.
And if you have any more questions about these aquifers then feel free to ask in the comment section below.
- Indoor Fishkeeping – The Ultimate Guide To Building A Thriving - July 25, 2026
- Fishkeeping Checklist – Your Step-By-Step Guide To A Thriving - July 25, 2026
- Best Automatic Feeders For Betta Fish – The Ultimate Guide To - July 25, 2026