How to Make Aqua Soil – Step By Step Guideline
Owning an aquarium requires plenty of responsibilities to deal with. Just taking care of certain residents in the aquarium would not be enough until you make a progress in the bottom layer as well. This layer is known as substrate and mostly consists of sand and gravel.
But these two elements are not enough if you care for the entire residents including plants. If you are tight on budget and don’t want to spend money buying commercial aquarium soil, you must be thinking now about how to make your own aqua soil.
Well, some aquarists will just buy any kind of commercial soil from stores. Since you are on this site then surely you prefer a DIY solution.
Undoubtedly, aquarium plant substrate will enhance the beauty of your entire aquarium with greenery. So, to help you with that we are here to offer you a complete guide regarding the topic.
Is Soil Necessary for Your Aquarium Plants?
Just like any plant, aquarium plants also require a proper mixture of substrate materials like sand, gravel, and soil. Thus, it proves that aquarium soil also requires soil to thrive and grow well.
Only fertile soil can provide all the essential nutrients to plants. Moreover, you should also know that each plant species requires unique needs for nutrition. Hence, the soil substrate also has to be made in that way.
Also, without a proper bottom layer of soil substrate, your aquarium might invite many bacteria and beetle larvae. These organisms might hurt your aquarium pets causing them several diseases. So, yes, the soil is necessary to let your aqua plants grow properly.
Moreover, your tank might also contain some bottom feeders. Loach, catfish, or similar species prefer soil substrate to feed themselves. Thus, aquarium soil brings good things to the entire tank kingdom.
Can You Use Regular Garden Soil as Aquarium Soil?
Well, you can use regular garden soil as your aquarium soil. However, it cannot be used directly as one would use it in a garden. Because garden soil sometimes contains contaminants, pesticides, and other chemical substances that can be harmful to aquatic life.
Moreover, not all garden soil offers the same nutrients and quality. You have to keep in mind that, unlike garden soil, aqua soil has to be always submerged. Normally, garden soils are rich in organic matter that makes the tank water cloudy.
That is why it has to have different soil properties along with the composition. This is why sometimes the garden soils cannot perform well with the plants and inhabitants in the aquarium setup. Aqua plants have their very own style to absorb nutrients, different from the terrestrial plants.
Again, regular garden soil is not always balanced and may have issues with imbalanced algae. Moreover, the soil might also carry excessive nitrates which is not good for the aquarium. Ammonia spikes in the garden soil may also kill the aqua fish.
Besides, garden soil sometimes contains contaminants, pesticides, and other chemical substances that can be harmful to aquatic life. However, it is possible to make regular garden soil usable for your aquariums as well. The soil just has to go through some preparations and processes.
If you’re looking for a substrate for your aquarium plants, it’s better to choose a specifically designed aquarium soil that will provide nutrients to your plant and also won’t create problems in the tank.
How to Make Aqua Soil-A Complete Guide
Step – 1: First, Collect Organic Soil
This is the first and foremost thing to do in this process where you want to make aqua soil by yourself. Choosing the soil type is also crucial especially for their aesthetic value. For instance, if you have black or dark colored rock in your tank, laying white or gray colored soil will make a better contrast than black or brown colored soil.
You can collect the soil from your garden with the help of a trowel or spade and bucket. However, It should be completely free from perlite, vermiculite and things that are not part of the soil. Avoid soils that have a high clay percentage. If you can make a small ball with them by rolling it in your palms then this type of soil is not suitable for your tank.
However, before collecting soil you must consider the measurement of your aquarium. The soil amount also depends on the thickness you require for your tank.
Thus, proper measurement and calculation have to be done. Besides, you also have to be careful of the place where you are collecting the soil. It would obviously be unwise if you collect from an unfamiliar place or a place where pesticides and fertilizers are used.
You cannot just pick any place to dig the soil as you never know if the place might have chemical spray or other unwanted fertilizers that would be harmful to aquarium habitats. This is why pick a location that is familiar to you.
Thus, while collecting soil you have to ensure that the soil has been chemical-free for a long time. Otherwise, you can also buy a bag of organic soil or potting compost from any nearby local nursery or garden center. It will be way safer than using garden soil.
Step – 2: Prepare the Soil
It is the most crucial step in this process. Only good soil preparation can result in the best aquatic soil. However, for preparing the soil, follow the below steps.
Sift the Soil
After collecting the soil from your garden, it is important to sieve the soil. You can sift using a strainer. It will remove the large stones, wood chips, or twigs from the soil. The main intention of sieving the soil is to make it clean and improve its texture.
Time to Bake
When you are done sifting the soil, it is time to bake it. Bake the soil at 200 degrees for 20 minutes. This step will eradicate several microorganisms from the soil like fungi and bacteria.
Also, soil bugs and unseen seeds will be gone. Overall, it sterilizes the soil. When you are done with baking, consider the soil is prepared.
Rinse The Soil
Now, place the sifted soil in a bucket and add de-chlorinated water to fully cover the soil. And, leave it to soak overnight. The next day, carefully pour off the water and leave just enough water to keep the soil moist.
In this way the soil becomes as clean and dirt free as possible. This process will help to remove any particles that are not part of the soil as well.
Now keep rinsing the soil under running tap water until the water turns clear. This will allow you to remove the sediments present in the soil that might create cloudiness in your aquarium later.
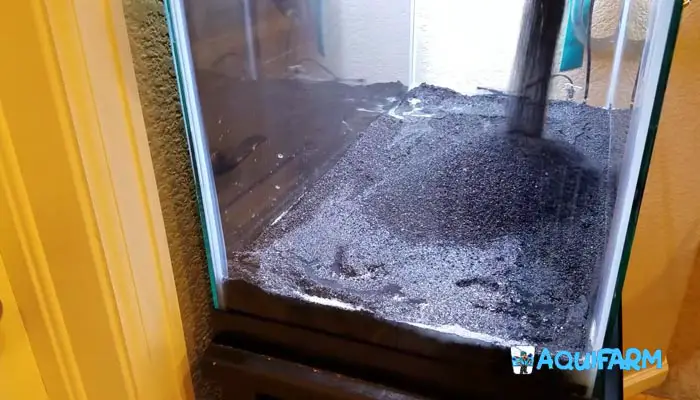
Step – 3: Lay the Soil
When the soil preparation is done, lay the prepared soil on the tank floor. Before laying the soil make sure to clean the aquarium thoroughly so that there is no debris present. Now spread the soil evenly across the bottom of the aquarium with the desired thickness.
The thickness will depend on the plant you are going to put in your tank and also the visual aesthetics you desire. If you wish to create slopes with your substrates, just adjust the thickness of the soil accordingly.
However if you plan to include rocks and driftwoods in your tank, make sure to position them before adding the soil. Because if you place them later, it will disturb the layering of your substrate. Remember that, If the substrate layer is very thin, the plants that are small and have short roots will be hard to plant in.
Step – 4: Prevent The Muddy Mess
The next step is to prevent the muddy mess the soil would make inside the tank. Use your garden soil as a base material and then place a layer of sand and gravel. It is pretty much mandatory to add a layer of sand and heavy gravel on the top because the sand will prevent the soil from stirring up. Moreover, the heavy gravel will also not allow the soil to float around the tank.
If it is not done properly then the soil might float and stir up the tank water creating a cloudy show of mud. Therefore, you have to be careful with the process. The plants in the aquarium will find their way into the soil and uptake nutrients as well.
Nonetheless, for your information, this particular step is named as Walstad style tanks or EI natural. However, if you are using garden soil in the aquarium and the tank plats are already rooted in it, then it is hard to move the plants.
If you give it a try then you might discover yourself stirring the entire soil substrate layer. Thus, professional aquarists suggest soaking the garden soil first for about 1 or 2 days. Then when it dries, put the soil inside the tank.
Also, know that sand and gravels work to guard the soil by covering it. So, the substrates will fight any disturbance against the soil.
Step – 5: Time to Fill the Tank
When you are done placing the soil properly in the bottom layer of your aquarium, it is time to fill up the tank with water. However, this step is also very crucial and requires immense carefulness. Remember that, once the tank water gets muddy, it will take hours to settle down.
So, obviously, you do not want to interrupt the soil layer that is capped with gravel and sand. Thus, it is convenient to pour the water from the downsides. It will prevent the stirring of the substrate to a great extent.
However, before pouring water, make sure there is no debris in the water. If there is any, skim it off. Moreover, it is better to go for a drain-and-flood method in the tank for several times. It will eradicate the murkiness of the tank water.
Certainly, it is up to you how many times you want to change the water. However, doing the step until the water gets transparent, clean, and visible would be preferable. This step is required if you haven’t washed it thoroughly before. When you finish doing this last step, bravo! You have done it all!
Tips
Here are some little tips for you
- Until the tank water stabilizes after adding water, do not add fish to it. Its stabilization might take one month or even more.
- Perform frequent water changes by that time since the soil has the possibility to release excess ammonium and nutrients in the water. It immensely takes place in the first week which is harmful to the tank habitats. Thus, constant water changes can reduce the level of excess release of nutrients and ammonium.
Pros and Cons of Aquarium Soil
Using aquarium soil substrate has some benefits but it is not perfect. The soil might not always play a suitable role for aquatic plants. Hence, let’s get to know their pros and cons.
Pros
Help Altering the Water
Aquarium soil substrates can alter the tank water ensuring the betterment of the aquarium. It neutralizes the pH of tank water and brings a balance making the water soft. Hence, tropical fish are benefit from the properties.
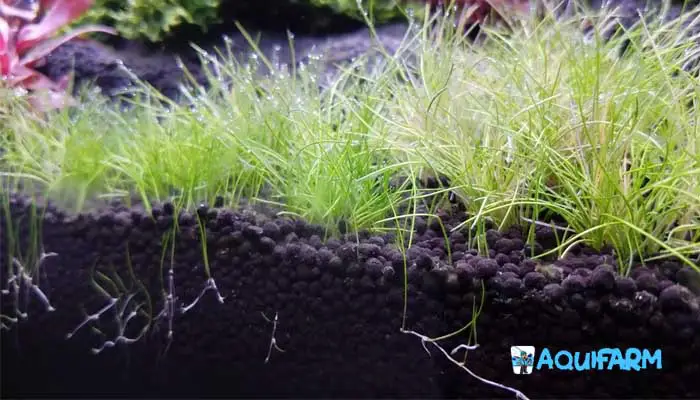
Beneficial for Carpet Plants
If you own carpet plants in your aquarium then surely aquarium soil is the best choice. The soil substrate helps the plant to thrive and spread fast and easily.
All you need to do is spread the plant seed in the substrate layer and wait.After some days, you will be amazed to see how fast they are growing and spreading.
Contains Nutrients
It is known to all that good soil always contains a great deal of nutrients necessary for plants to grow be it terrestrial or aquatic plants. Thus, if you manage to add quality aquarium soil to the tank then there is no need to add other nutrient-imparting elements like root tabs.
Saves Money
Garden soil is usually more affordable than specialized aquarium substrates that are found in stores. So, some aquarists are more attracted to garden soil as its readily available in their backyard.
Induces Beneficial Bacterial Growth
Aquarium soil substrate offers bacterial growth that is beneficial to the entire ecosystem of the aquarium.
Provides Natural Appearance
Garden soil that are used in aquarium offers a more natural appearance that fulfills the desires of some aquarists for a natural aesthetic tank setup.
Cons
Murky Water
It is one of the biggest problems of aquarium soil. It makes the water murky creating a mess. Also, this situation ruins the beauty of the tank. Moreover, it also interrupts the free movement of fish.
Contaminants
Garden soil can contain pesticides, fertilizers, and other chemicals that are harmful to aquarium fish and invertebrates. Besides, these contaminants can lead to water pollution in the tank and kill aquatic plants.
Capping is a Must
If you want to add aquarium soil, then you will also have to take the extra hassle of capping the soil as well. Hence, you need to add gravel along with sand over the soil as well which takes up more space in your aquarium.
In that sense, in order to use garden soil in the aquarium, a large sized tank is required.
Commercial Soil is Expensive
If you are not making the soil on your own but rather willing to buy it, then know that it is expensive. But what is more expensive are the capping substrates including sand and gravel.
Unpredictable Results
Garden soil has various components mixed so it’s sometimes difficult to manage and maintain the optimum nutrient levels. Even it can be hard to predict how it will perform with certain plants and aquarium inhabitants. So, having garden soil in the aquarium comes with an added challenge that an aquarist has to take on.
Requires Replacement
Another big drawback is that the aquarium soil is not going to serve you forever. In fact, it requires replacement after every two or three years. It is because, at a certain point, the soil has no nutrients to offer the plants.
Thus, there would be no point in keeping the soil in the tank. So, replacing it with new soil along with replanting new plants becomes necessary in the tank.
Read More-
Final Thoughts
Now that you know how to make aquatic soil, you can do a little experiment by yourself and give the process a try. Even though there are some drawbacks to aquarium soil and its substrates, you never know when it can even turn out to be beneficial for you.
Besides if need to make your aquarium look healthy and aesthetically beautiful, this is a great option for you. Again, though commercial aquatic soil is expensive, you have options to make it by yourself. Though it will require some work, It would surely save some bucks.
So, if our article was helpful to you then let us know through your feedback. Also, ask away any queries and we will answer.