Aquarium Hood Light Not Working- [Explained!]
While your tank setup needs to be perfect, your hood light may not work. We know how troublesome it can be.
So you want to know why is your aquarium hood light not working?
There are mainly 3 reasons why your hood light isn’t working. The first one is a failed ballast. Without it, your fluorescent lights won’t function. Again, there might be a shorted light fixture for which the light isn’t working. Lastly, a faulty adaptor or too used LED lights might be the reason.
But knowing only this much won’t help you. Don’t worry, though. We’ve written a whole article to elaborate on this.
Aquarium Hood Light Not Working- Reasons and Solution
Hood lights are an important part of your tank setup. Without it functioning properly, indeed it’s a problem that needs to be addressed. As mentioned above, there are quite a few reasons why they might malfunction.
Thus, we’ve taken the time to elaborate on each problem. We’ve also tried to provide solutions for each problem. So, be sure to stick with us till the end.
1. Failed Ballast
One of the prime reasons you aren’t getting hood light is a failed ballast. Ballasts are necessary for all fluorescents to operate. Although not for LED. So, if your hood light is fluorescent, a bad ballast may be the problem.
So, why does ballast go bad?
The immediate environment, especially the heat, and humidity, is a common contributor to ballast failure. A ballast may burn or cease to start lamps when the environment is too hot or cold. Corrosion can develop over time in an electronic ballast due to heat and persistent moisture.
In fluorescent lights, it is the ballast that regulates the current. It provides sufficient voltage, and without this regulation, the bulb ceases to operate. Thus, if this problem does occur, it’s important to replace the ballast.
Replace Ballast
As we already know, replacing a bad ballast is of utmost necessity. So, how to change the aquarium light ballast?
Follow this easy guide and you’ll be good to go:
- Before you start work, ensure the power source is unplugged and turned off. It’s the same for any electrical item. Your light fixture should be disconnected and taken out of the tank.
- Take off the fixture’s cover. Some are simple to remove, while others include side-locking clasps. Screw the light bulbs in 90 degrees and then pull carefully until the bulb comes off.
- Examine the sockets in which each bulb’s end is held. You might want to think about replacing or tightening them if they’re loose.
- Remove the cover plate from the wires, which are frequently in the middle of the fixture.
- Both the ballast and its wires ought to be visible now. Find the white and black wires. They are the light’s power sources. To make sure there is no power to the device, use a non-contact voltage tester. It’s used to test each wire.
- Disconnect the ballast from the fixture by unscrewing the mourning bolts or nuts.
- Bring the ballast to your neighborhood hardware store so you can select an appropriate replacement.
- Once you have the replacement ballast, install it into the fixture by using the nuts and bolts you previously removed. Replace the cover, light bulbs, and cover plate. Reinstall the fixture in your aquarium after reconnecting it to power.
Finally, check if your hood light is working after replacing the ballast.
2. A Faulty Light Fixture
Another problem you might face is a faulty light fixture. If this is the problem, then your lights won’t turn on either. Firstly, you need to know how to tell if your fixture is bad. So, how to tell if the light fixture is bad?
Here you can use a multimeter. Use the other lead to make contact with the bulb at the base of the socket. Keep a reading log. If it’s somewhere around 120 volts, the light fixture works properly. The fixture is defective if the reading is zero or one that is significantly below 100 volts.
Now that you know if your fixture is bad, let’s talk about why it got bad. So, why does an aquarium light fixture go bad?
The main reason is a shortage in the wiring. The insulation of wiring can become damaged over time by the produced heat. That is exposing the conducting metal. A short occurs when the exposed conductor makes contact with the fixture’s base. This also happens with a metal electrical box or another exposed wire.
If this actually happens, you can follow the following procedures.
Fix Short
You can choose how to fix the problem after you know where it happened. If you notice a melted wire, you can usually cut it out. Then patch in a new one of the same gauge.
However, if the wire is close to the socket’s base, this process becomes more challenging. The best course of action may occasionally be to change the socket or the fixture as a whole.
Making the connection tighter will solve the problem if the short was brought on by a slack connection, but be sure to check for damaged wires and twist them to gather the strands.
A single strand that protrudes and makes contact with another wire or terminal screw can sometimes produce a short.
Additionally, it’s a good idea to replace any burnt terminal screws. Because conductivity may be hampered by carbon deposits left from arcing.
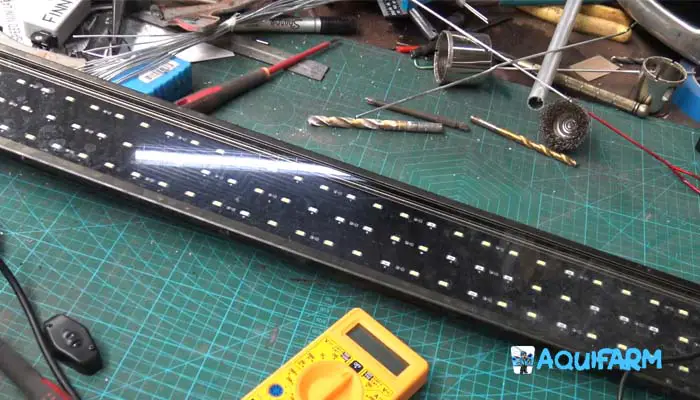
3. Faulty Adaptor or Worn-out LED
If your hood light is LED, a problem you might face is that it’s blinking but won’t turn on. And it feels like the light is trying to turn on but just can’t. So, why does the aquarium LED light keep blinking?
It might be that you have a faulty power unit. A malfunctioning power supply adaptor might be the root of this problem. Also, while changing, you might’ve used the wrong bulb in your LED light. Finally, the LED clip-on light itself might be too old. Thus, it’s not turning on.
All of these problems need to be addressed differently. So, let’s get right into them.
Replace Power Unit or Bulb
You can use a voltmeter to identify if the power unit is faulty.
You can easily replace the adapter if the power supply is dead. It is available online and at any hobby store.
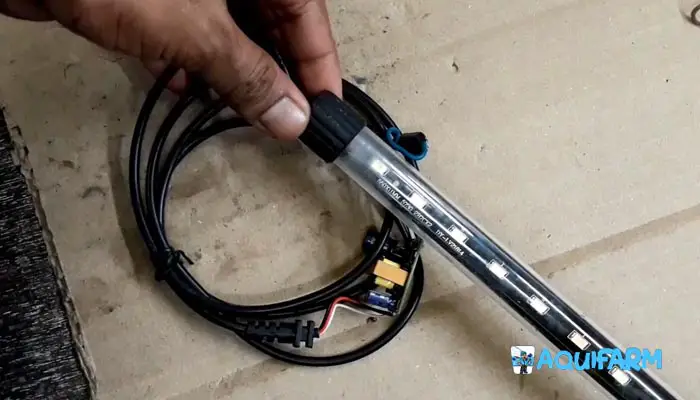
You may occasionally notice that a new power adapter isn’t functioning properly. Only a few of the LED lights in this instance are glowing. We have observed that these LED lights automatically unplug.
This occurs because the plugs are gently pushed out by the rubber underneath the sockets. This problem is simply solved by connecting each LED light bulb separately. The unplugged ones are located beneath the movable plastic cover.
On the other hand, you might be using the wrong type of bulb or worn-out bulbs. In that case, simply replace them.
FAQs
How Long Do Fish Tank Lights Normally Last?
It’s important to change the light bulbs in freshwater and saltwater aquariums on a regular basis. That is to maintain the best possible conditions for the plants and coral. Plan to replace your aquarium lights every 6 to 12 months, depending on your variety. The exact timetable may change on it.
Where Shouldn’t I Put A Fish Tank?
Consider visibility as well as safety. You shouldn’t place your fish tank near a doorway or busy area where it can be disturbed by a rushing youngster or rambunctious dog. Additionally, avoid positioning the tank just behind a gate where it could become obstructed and banged every time it’s opened.
Do Fish Prefer Blue Light?
Your aquarium’s blue LED lighting produces a relaxing atmosphere. According to fish lovers, blue light works best as a bridge between darkness and light. As blue light resembles the moonlight, you can utilize it in the evenings to encourage your hesitant fishes to emerge from their hiding places.
Conclusion
Now we’d like to hear from you.
Were we able to solve all your queries about the aquarium hood light not working?
Here’s an extra tip for you. While lighting your aquarium, it’s advised to use the full RGB spectrum.
If there’s anything else on your mind, be sure to comment down below.
- Indoor Fishkeeping – The Ultimate Guide To Building A Thriving - July 25, 2026
- Fishkeeping Checklist – Your Step-By-Step Guide To A Thriving - July 25, 2026
- Best Automatic Feeders For Betta Fish – The Ultimate Guide To - July 25, 2026